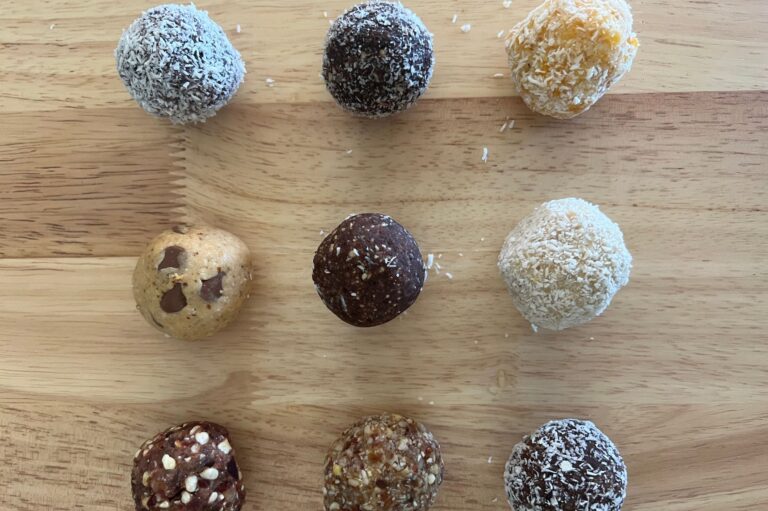
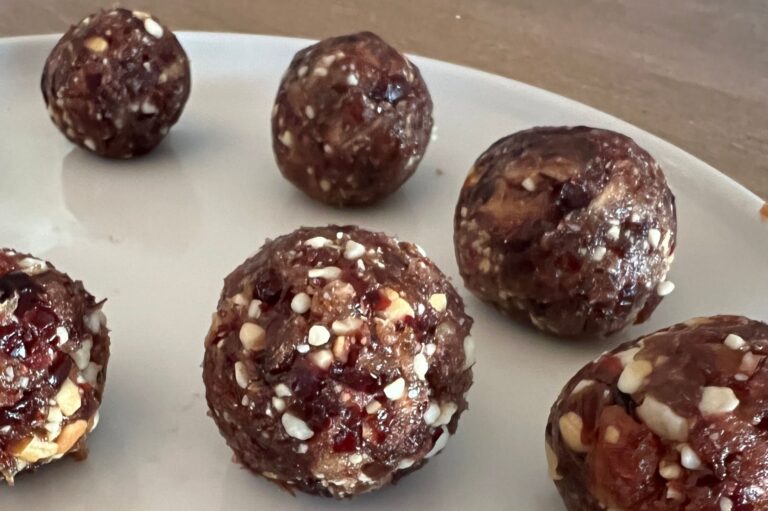
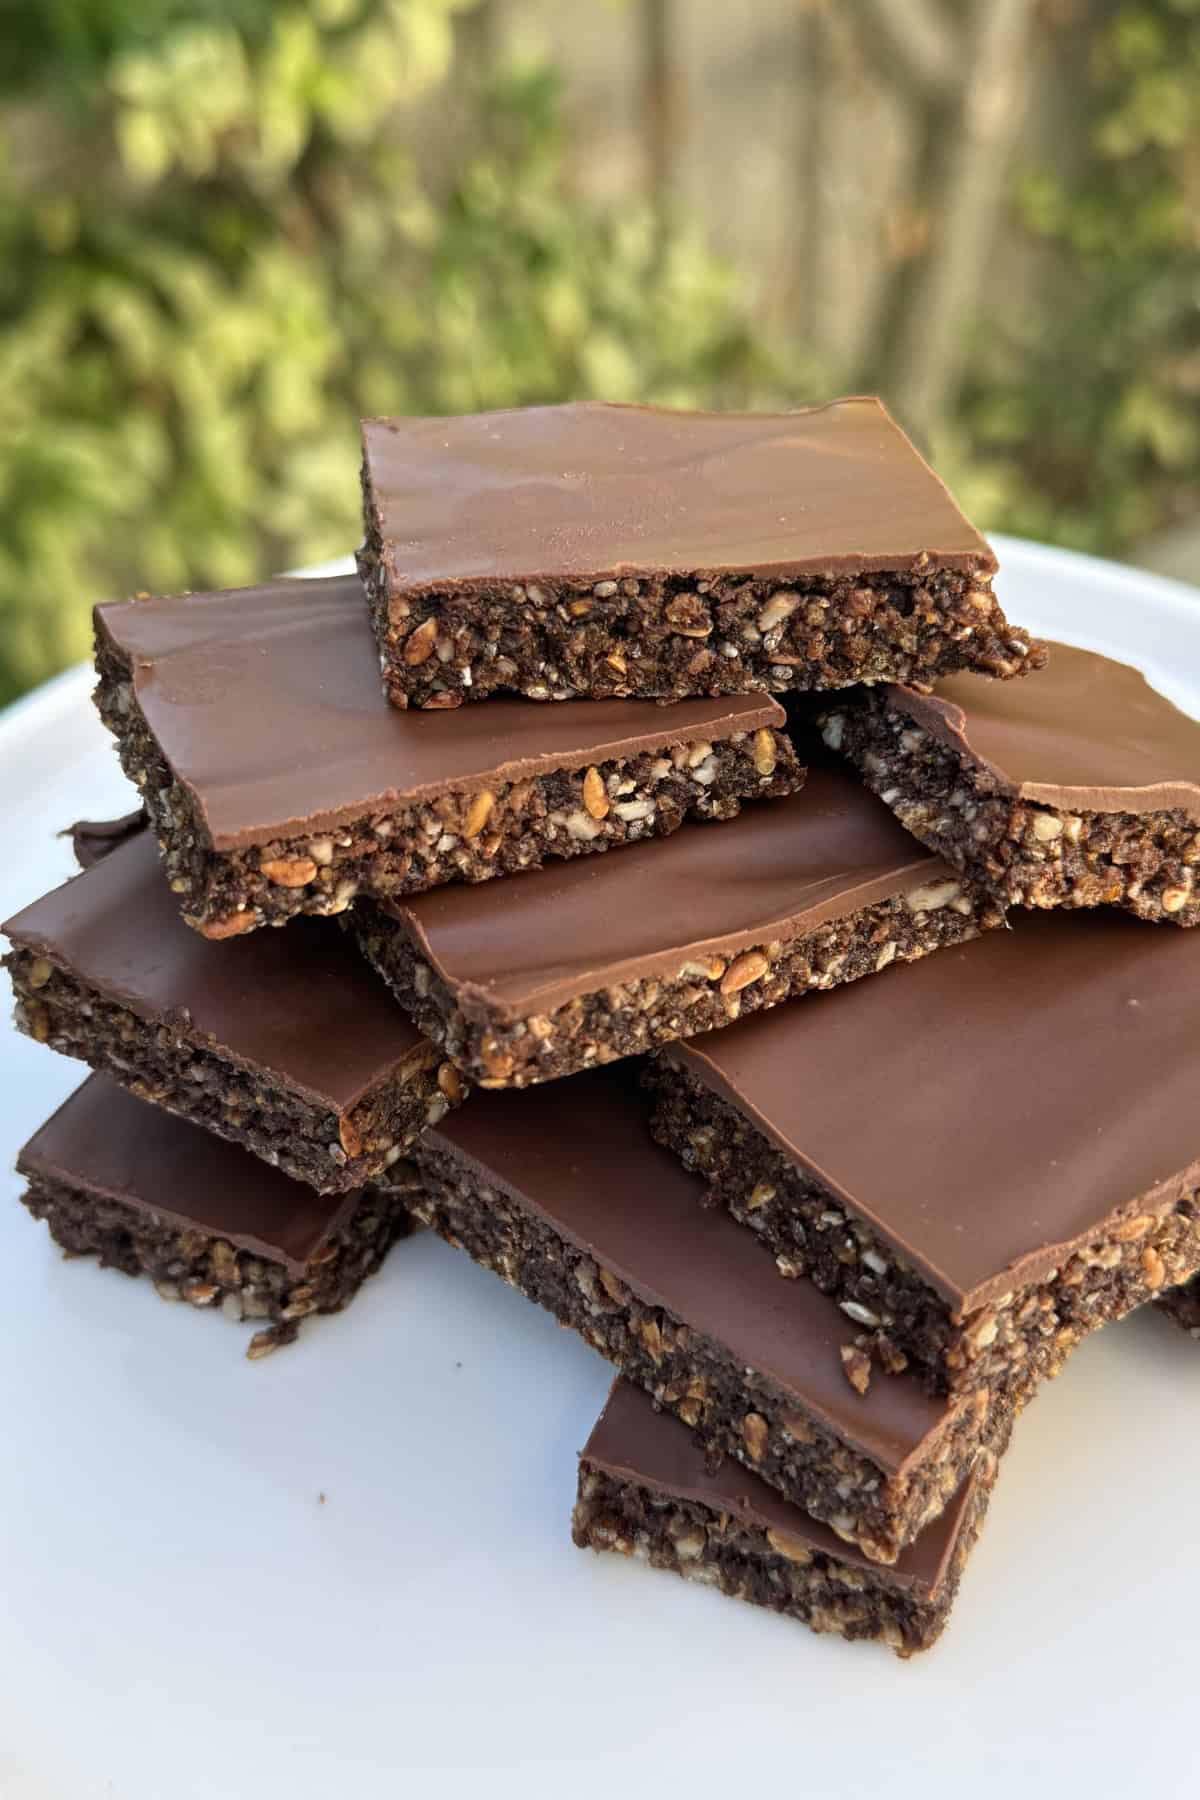
Chocolate Seed Bars (Gluten-Free, Nut-Free)
These gluten-free Chocolate Seed Bars are chewy, chocolatey, nut-free and completely no-bake – making them perfect for school lunchboxes. Made with dates, seeds and gluten-free cereal, they’re simple to make, freezer-friendly and hold together beautifully.

Gluten-Free Chocolate Seed Bars
If you’re managing a gluten-free household and trying to find snacks that are safe, filling and actually get eaten… this one is a keeper.
No oven. No complicated ingredients. No expensive nut butters. Just real food that works.
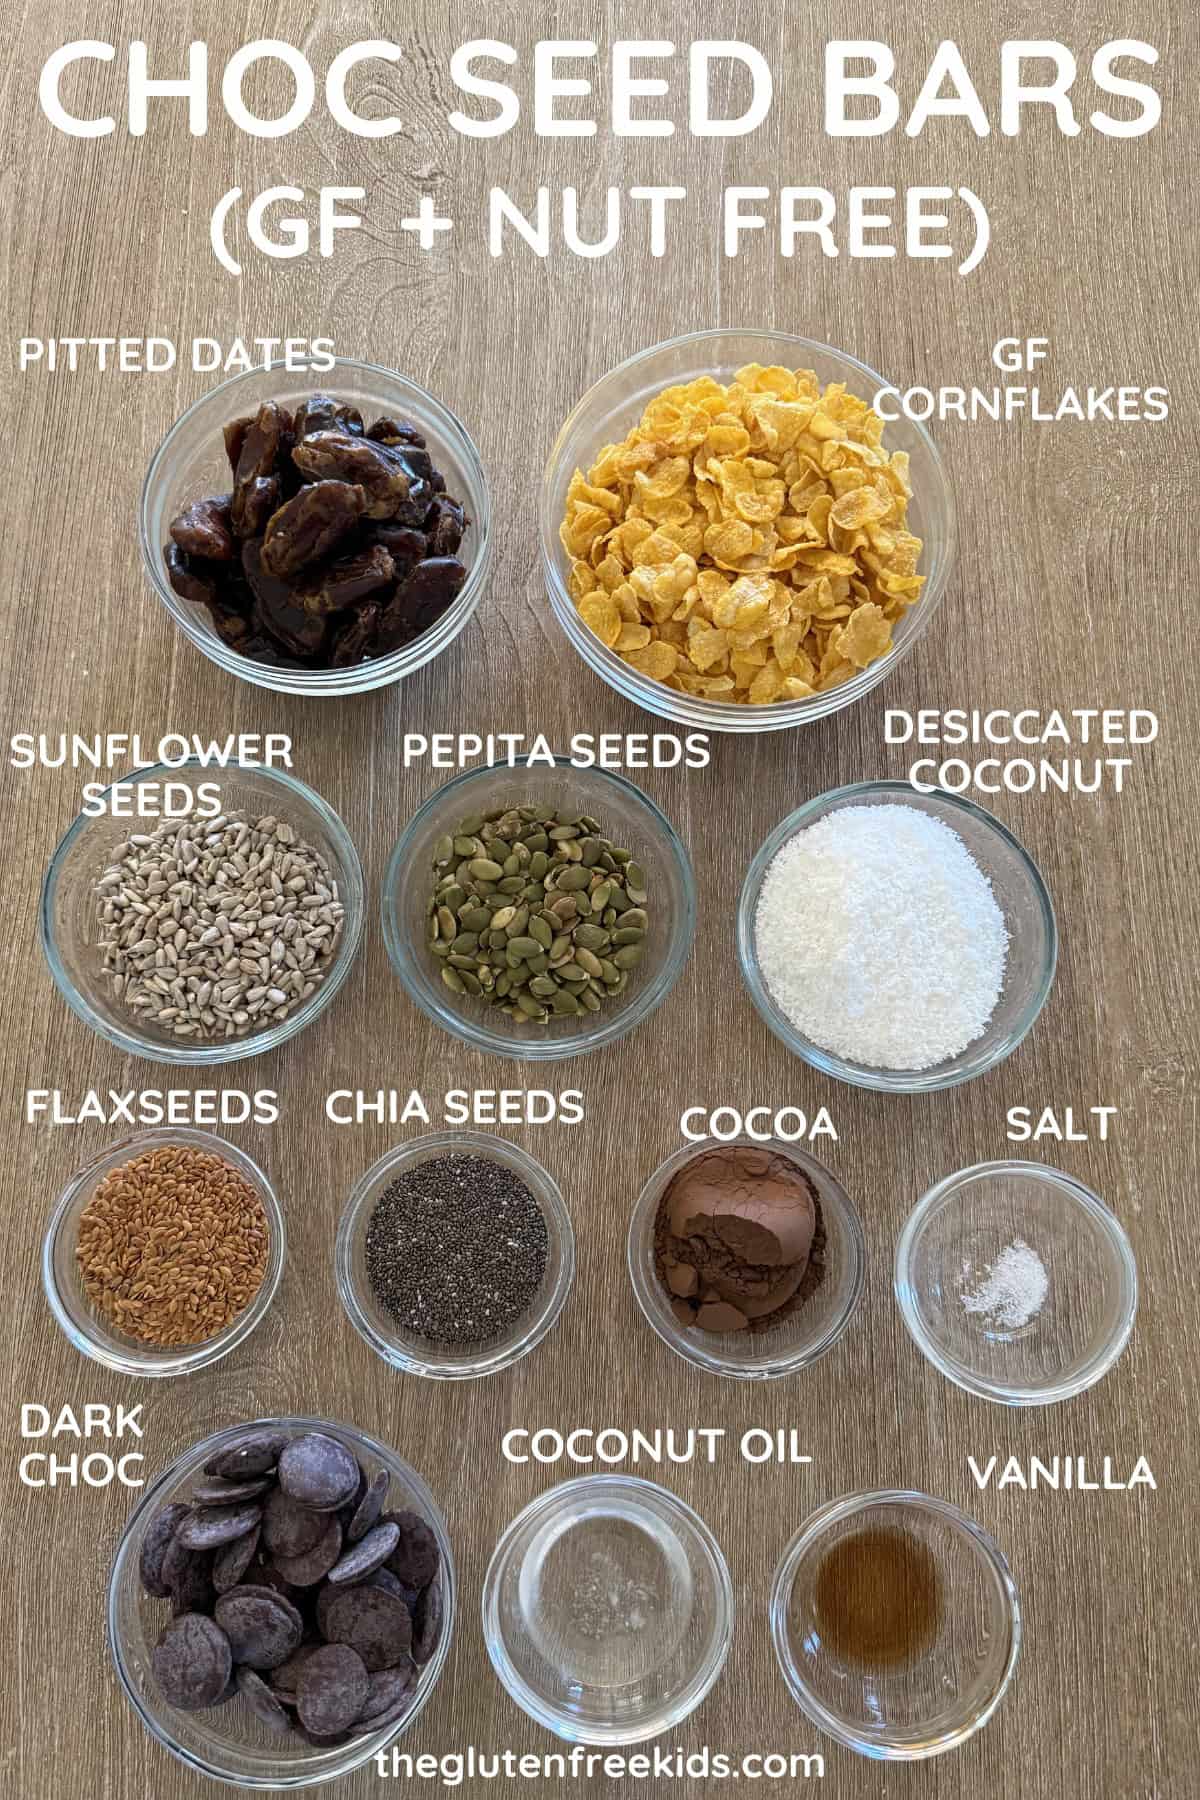
Ingredients Required to Make Chocolate Seed Bars
These are simple pantry staples – nothing strange, nothing hard to find.
Base
- pitted Medjool dates (or dried pitted dates work well too)
- sunflower seeds
- pumpkin seeds (pepitas)
- chia seeds
- flaxseeds (linseeds)
- gluten-free cornflakes
- desiccated coconut
- cocoa powder
- salt
- vanilla extract
Topping
- chocolate of choice
- coconut oil
What You Need
- Food processor (one that’s strong enough for blending dates)
- 20cm x 20cm (8×8 inch) square pan, or a larger rectangle 18cm x 28cm (7×11 inch) pan also works, you will just have thinner bars.
- Baking paper
- Microwave-safe bowl (or small saucepan) for melting chocolate
How to Make Chocolate Seed Bars Step by Step
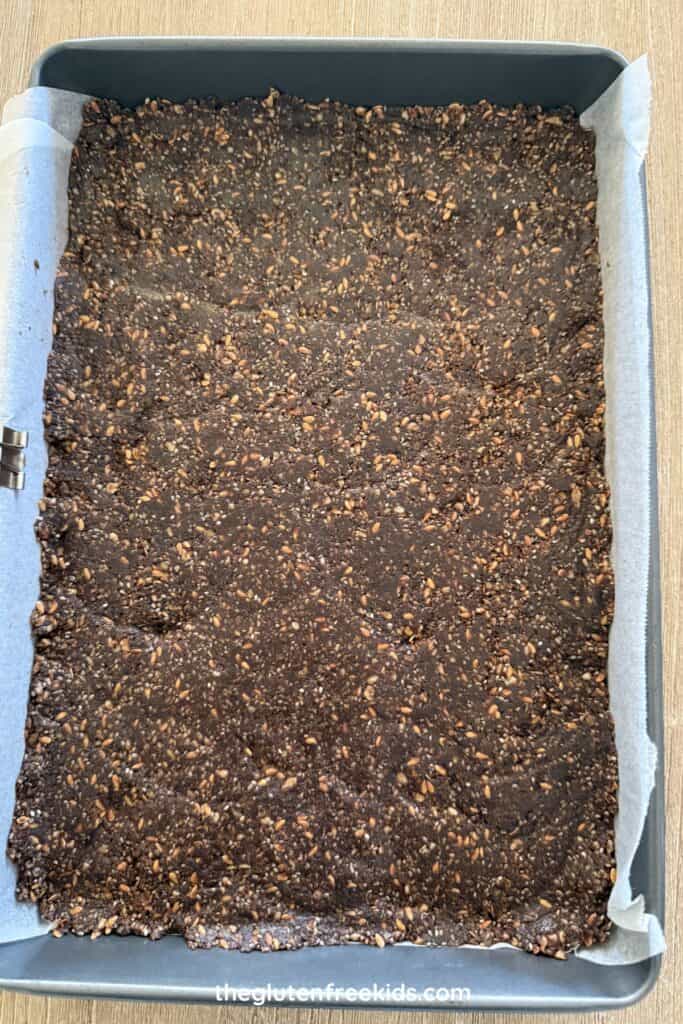
Step 1: Line a 20cm x 20cm (8×8 inch) pan (for thicker bars) or a 18cm x 28cm (7×11 inch) pan (for thinner bars) with baking paper.
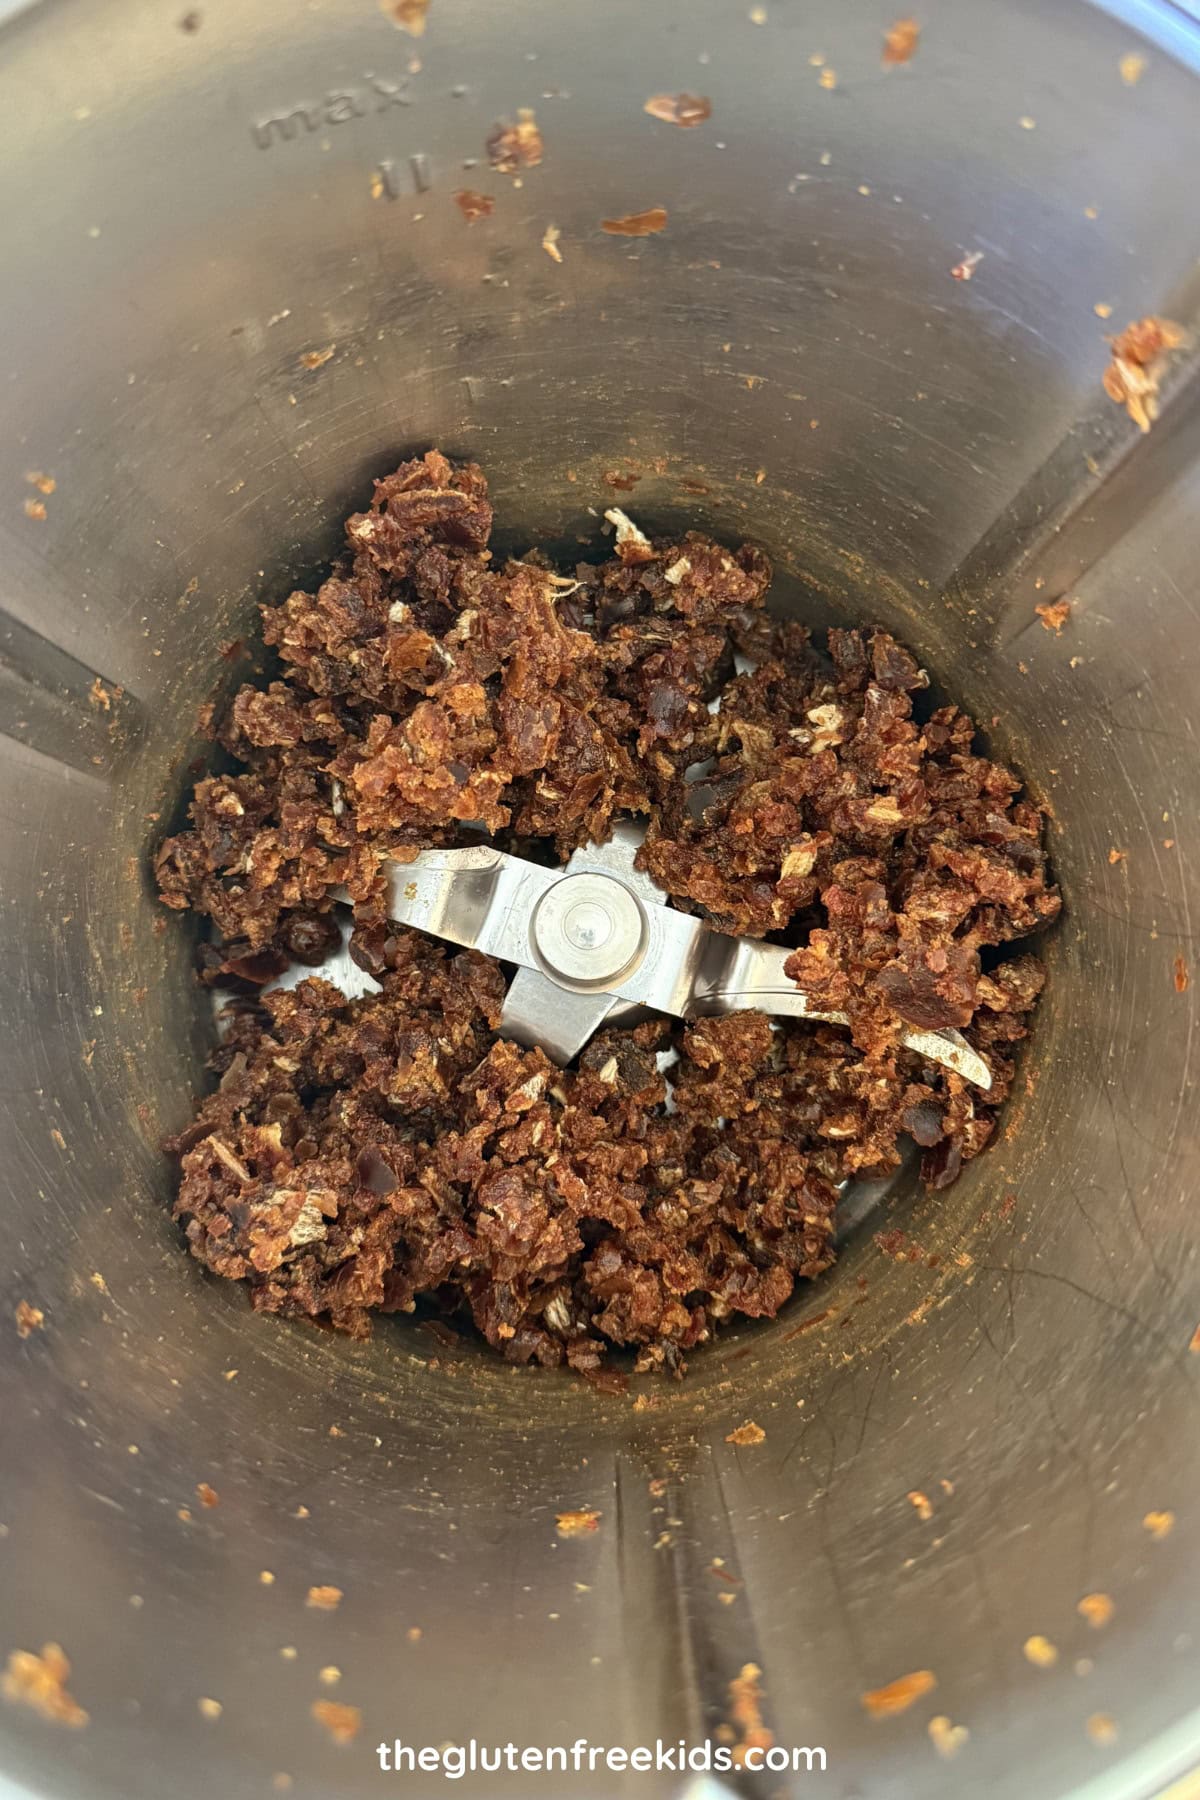
Step 2: Add dates, to a food processor and blend until they form a sticky paste. If the dates are dry and not forming a paste, add 1 tablespoon of water at a time (up to 2–3 tablespoons total) and blend again until soft and sticky.
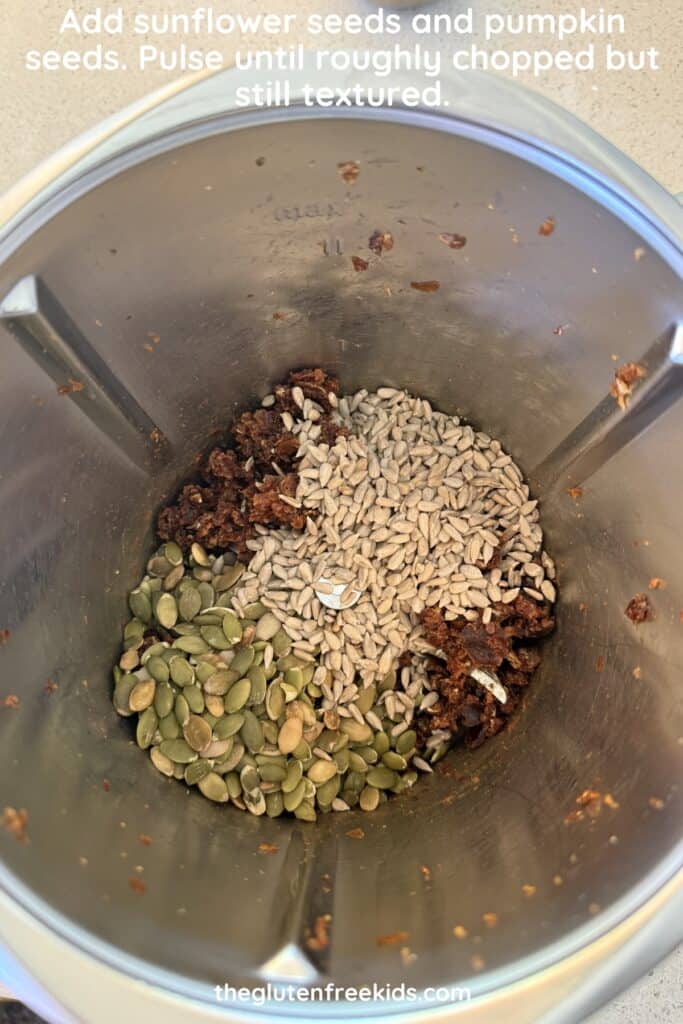
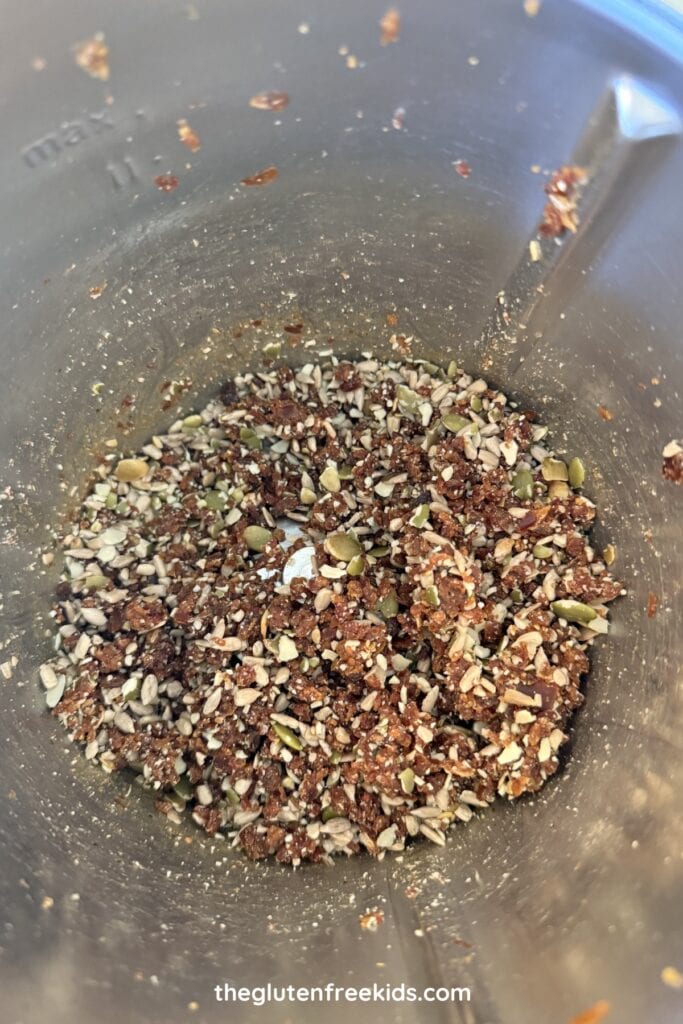
Step 3: Add sunflower seeds and pumpkin seeds. Pulse until roughly chopped but still textured.
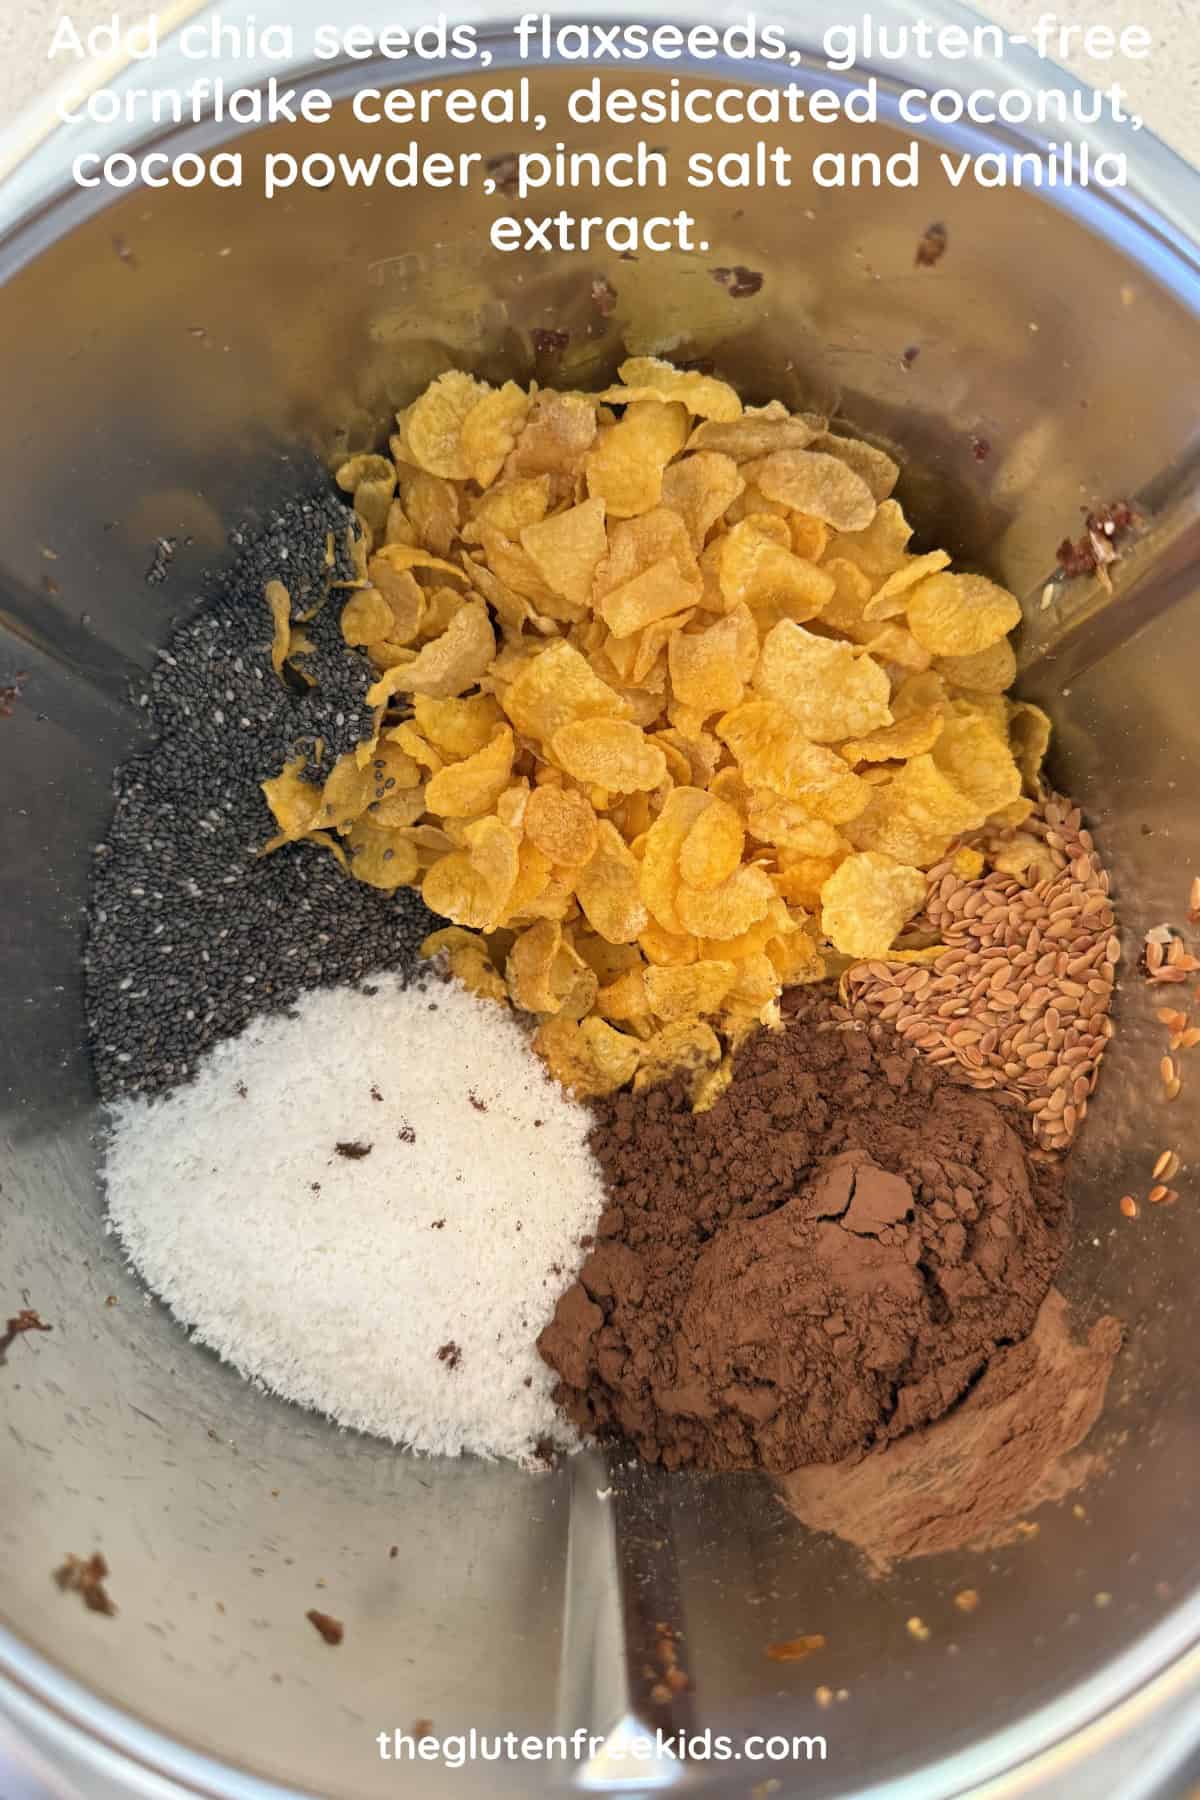
Step 4: Add chia seeds, flaxseeds, gluten-free cornflake cereal, desiccated coconut, cocoa powder, pinch salt and vanilla extract. Pulse until combined.
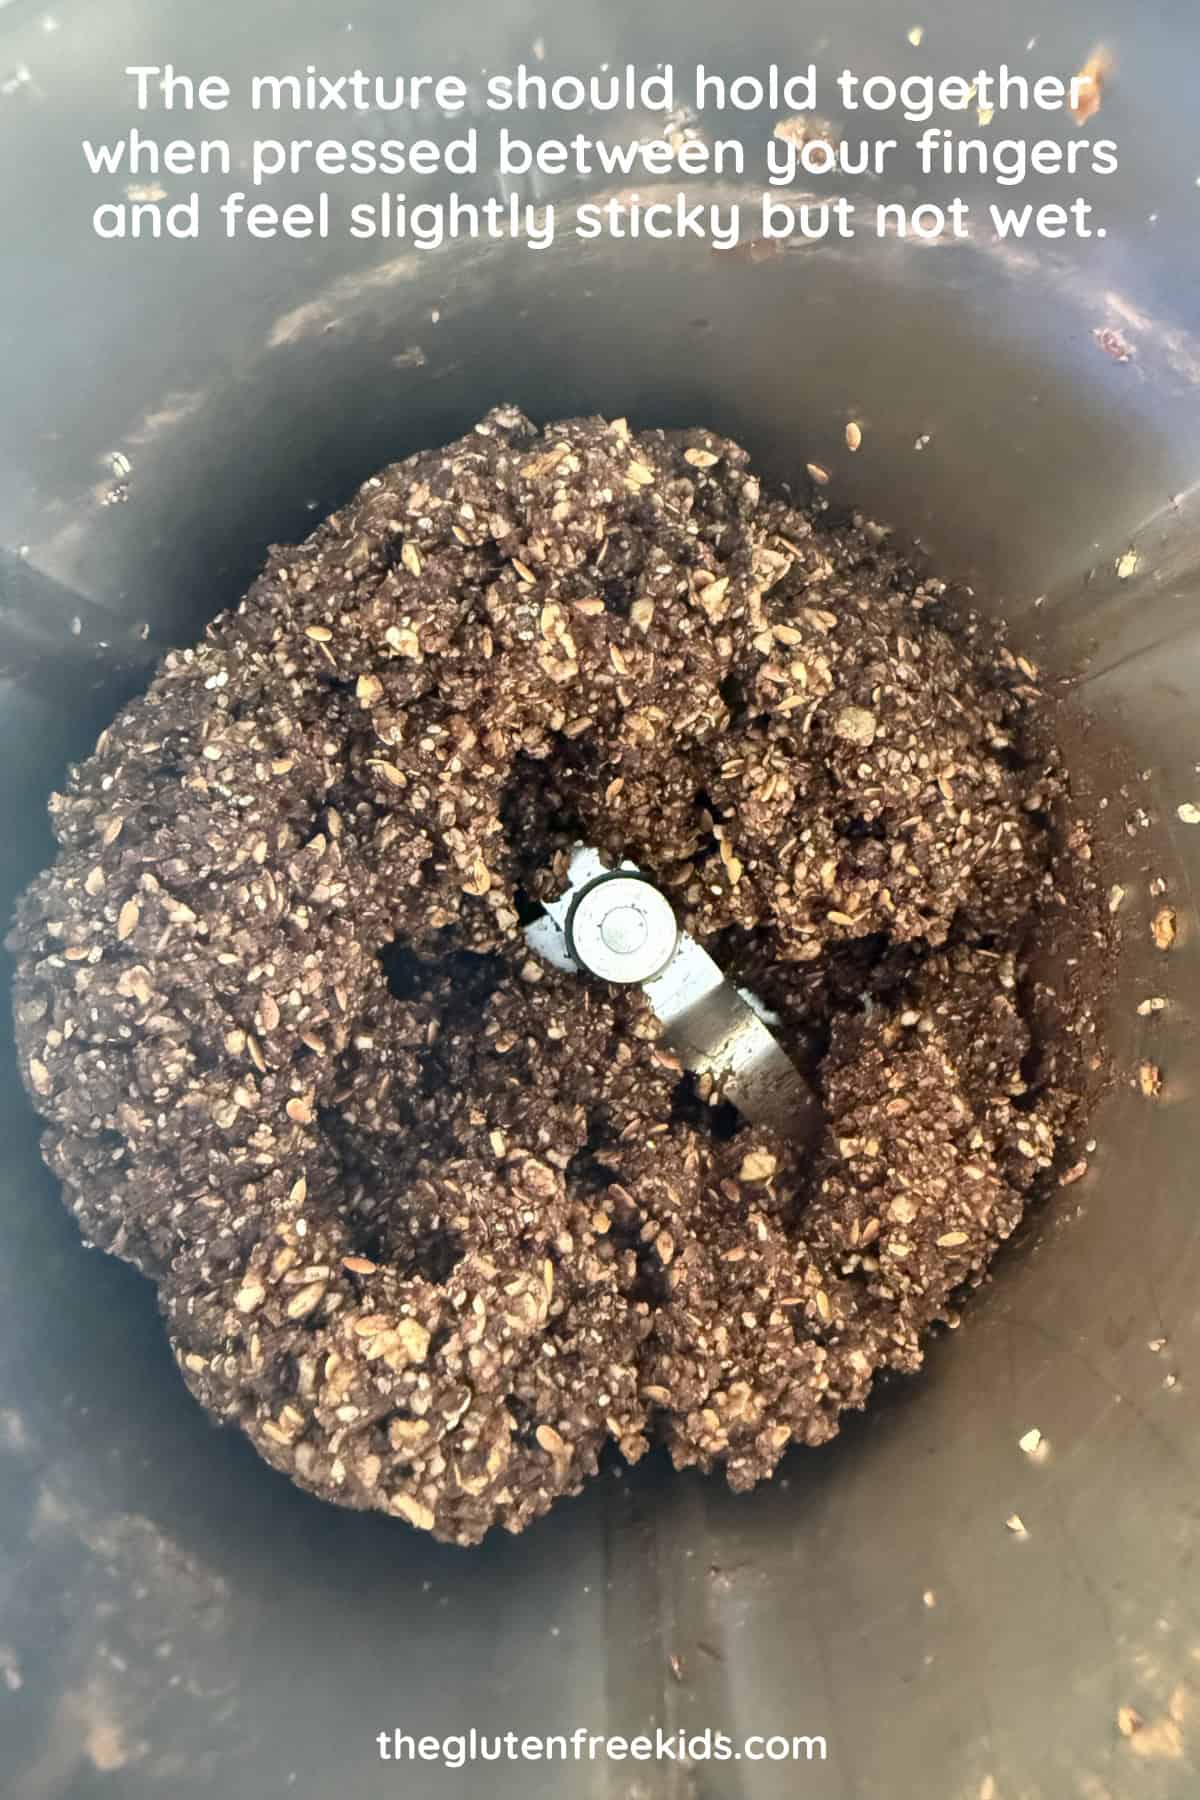
Step 5: Check the texture. The mixture should hold together when pressed between your fingers and feel slightly sticky but not wet. If it feels crumbly and doesn’t stick together, add 1 tablespoon of water and pulse again.
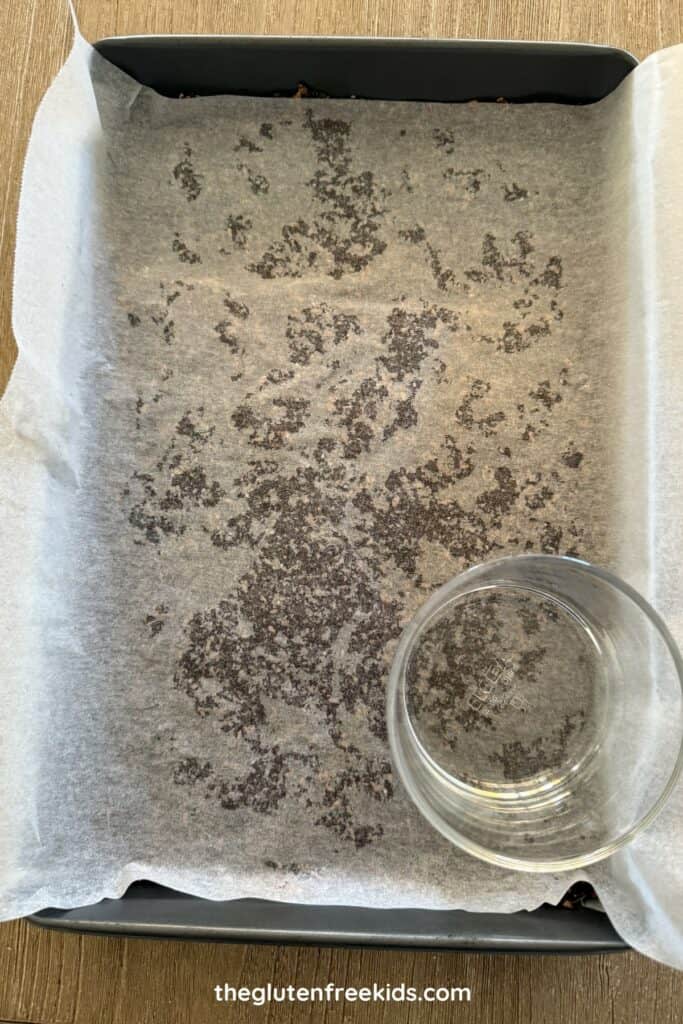
Step 6: Press the mixture firmly into the prepared pan. Use the back of a spoon or the base of a glass to compress it tightly.
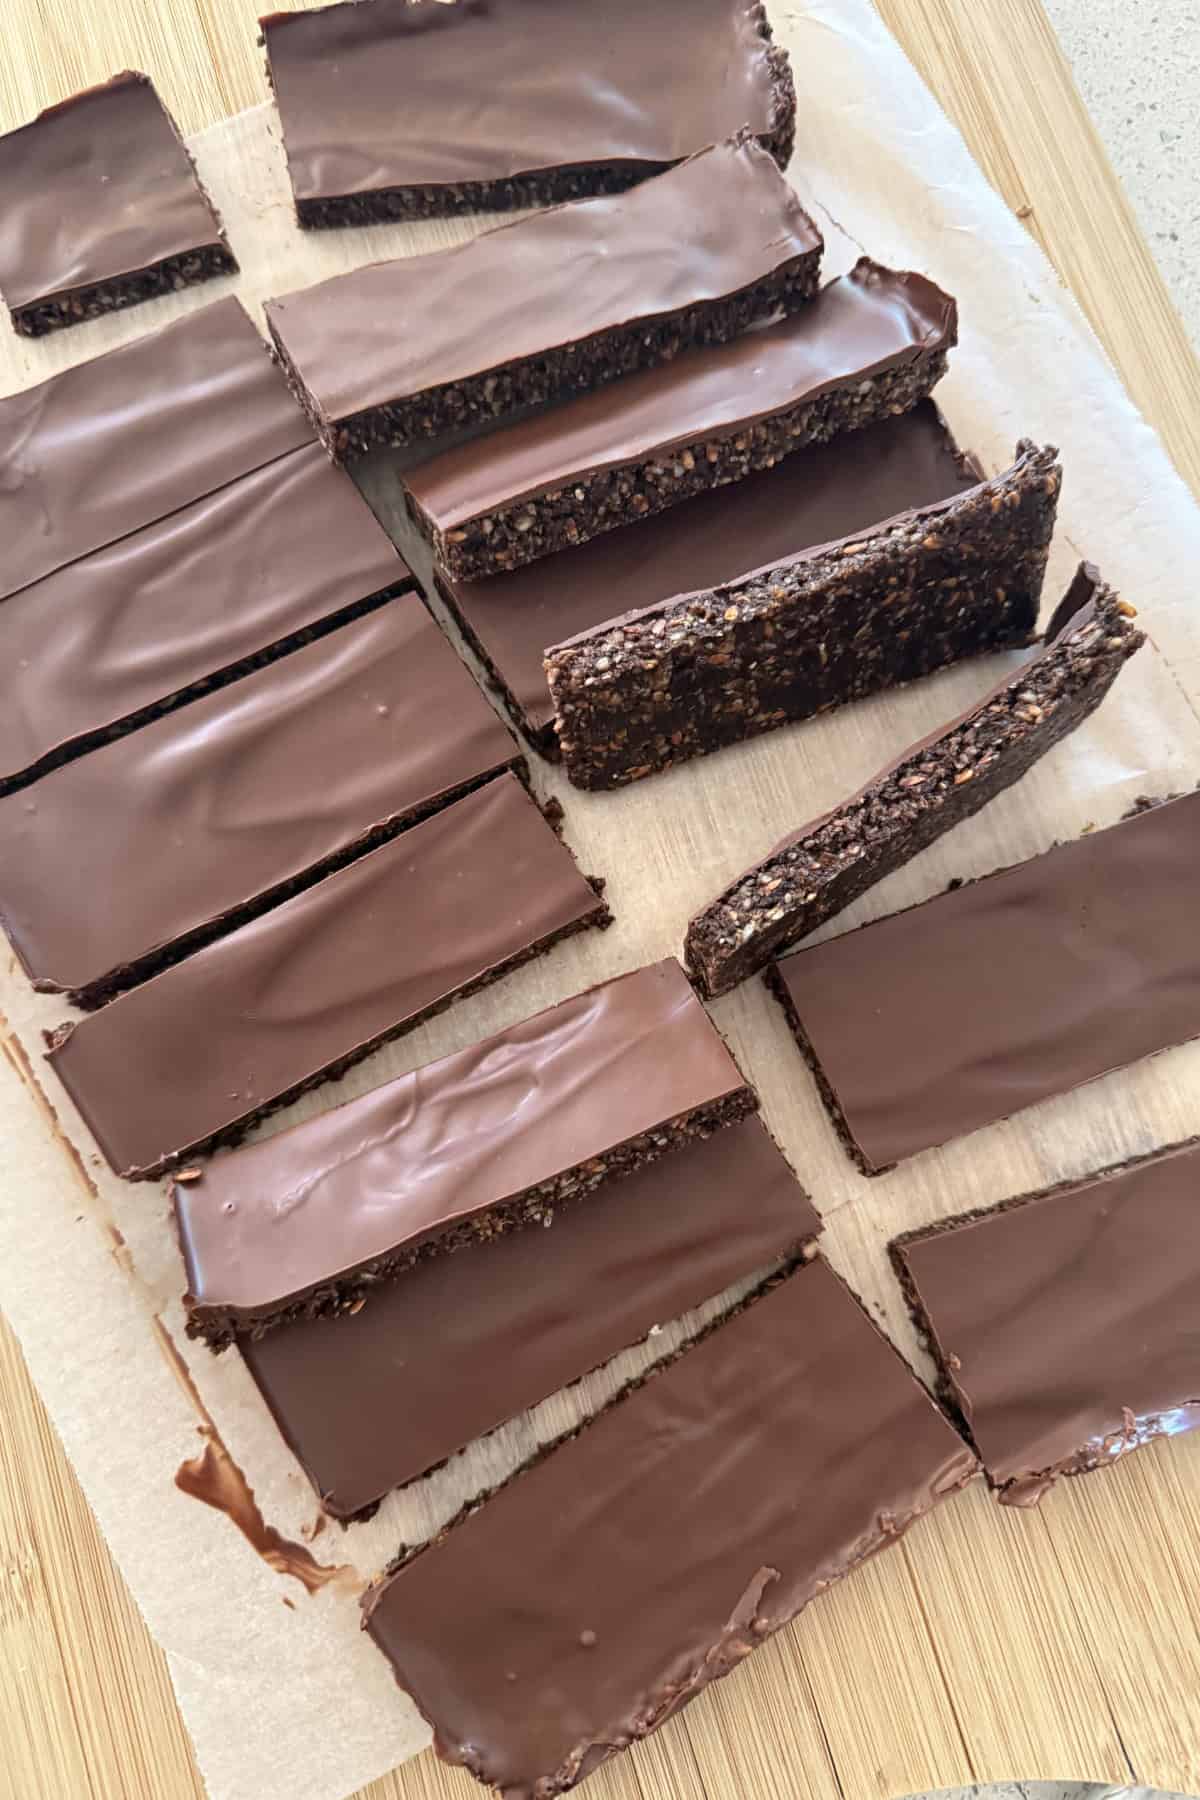
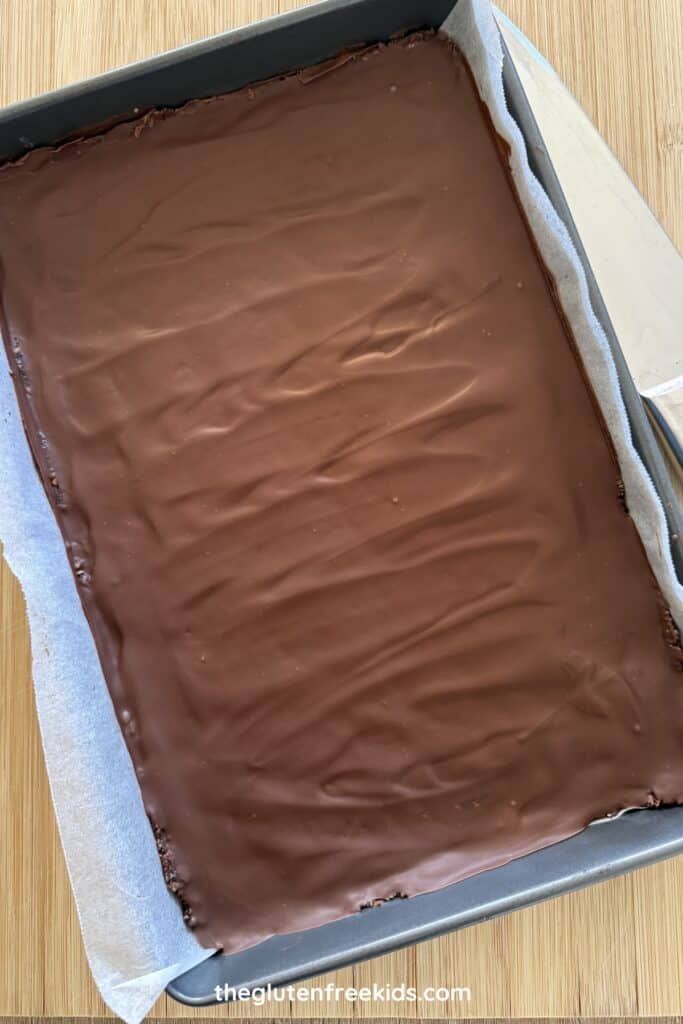
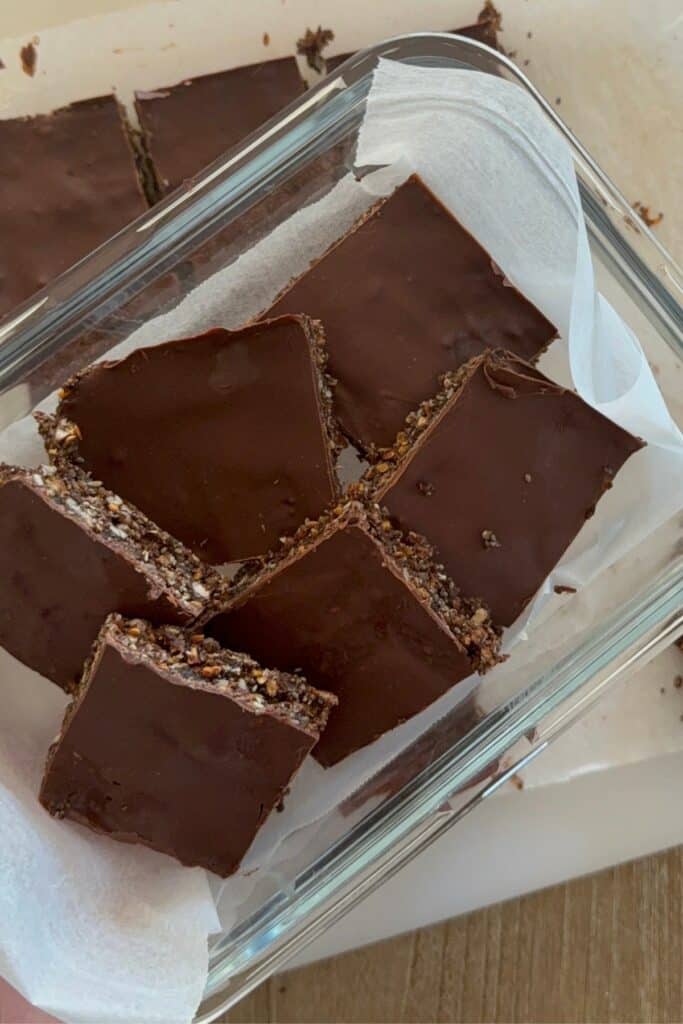
Step 7: Melt the chocolate, and oil together in 20-second bursts in the microwave (or gently on the stovetop), stirring until smooth. Pour over the base and spread evenly. Refrigerate for 1 hour to set. Slice and serve.
Chocolate Seed Bars (Gluten-Free, Nut-Free)
Ingredients
Base:
- 1½ cups Medjool dates, pitted
- 2 tablespoons water (if needed, depending on dates)
- ⅓ cup sunflower seeds
- ⅓ cup pumpkin seeds
- 2 tablespoons chia seeds
- 2 tablespoons flaxseeds
- 2 cups gluten-free cornflake cereal
- ½ cup desiccated coconut
- 2 tablespoons cocoa powder
- pinch salt
- 1 teaspoon vanilla extract
Topping
- 90 grams (3.17 oz) dark chocolate, or chocolate of choice
- 1 tablespoon coconut oil
Instructions
- Line a 20cm x 20cm (8×8 inch) pan with baking paper.
- Add 1½ cups Medjool dates, to a food processor and blend until they form a sticky paste. If the dates are dry and not forming a paste, add 1 tablespoon of water at a time (up to 2–3 tablespoons total) and blend again until soft and sticky.
- Add ⅓ cup sunflower seeds and ⅓ cup pumpkin seeds Pulse until roughly chopped but still textured.
- Add 2 tablespoons chia seeds, 2 tablespoons flaxseeds, 2 cups gluten-free cornflake cereal, ½ cup desiccated coconut, 2 tablespoons cocoa powder, pinch salt and 1 teaspoon vanilla extract. Pulse until combined.
- Check the texture. The mixture should hold together when pressed between your fingers and feel slightly sticky but not wet. If it feels crumbly and doesn’t stick together, add 1 tablespoon of water and pulse again.
- Press the mixture firmly into the prepared pan. Use the back of a spoon or the base of a glass to compress it tightly.
- Melt the 90 grams dark chocolate, and 1 tablespoon coconut oil together in 20-second bursts in the microwave (or gently on the stovetop), stirring until smooth. Pour over the base and spread evenly.
- Refrigerate 1–2 hours until set. Slice and serve.
Recipe Notes:
- Date texture: any dried dates work in this recipe, the only difference is that you may need to add extra water if not using Medjool dates. If your dates are firm or dry, add 1 tablespoon of water at a time while blending (up to 2 to 3 tablespoons) until a sticky paste forms. The mixture should hold together when pressed between your fingers.
- Gluten-Free Cereal: Regular cornflakes often contain barley malt and are not gluten-free. Always check the label carefully.
- Press Firmly: Really compress the mixture into the pan. Use the base of a glass or measuring cup and press firmly – this is what prevents crumbly bars.
- Slicing: Let the bars sit at room temperature for 5 to 10 minutes before slicing. Use a sharp knife and wipe between cuts for neat edges.
- Storage: we often keep a stash of these cut up in our freezer (last up to 3 months) as they are delicious cold or at room temperature.
Nutrition Information:
FAQs Chocolate Seed Bars:
Yes, but you may need to soften them first. Regular dried dates are often firmer and less sticky than Medjool dates. Soak them in warm water for 10 minutes, drain well, then blend. You may still need to add 1 to 2 tablespoons of water to help the mixture form a paste.
These bars are made with whole ingredients like dates, seeds and gluten-free cereal, with no refined sugar in the base. They’re naturally nut-free and can be dairy-free if you use dairy-free chocolate. While they do contain chocolate on top, they’re a more balanced snack option compared to many store-bought bars.
If your bars are crumbling, it would be due to one of two things – make sure the dates are blended into a sticky paste (add water if needed) and press the mixture very firmly into the pan before chilling. If the mixture doesn’t hold together when pressed between your fingers, pulse in 1 tablespoon of water and test again.
Yes. Replace the desiccated coconut with extra gluten-free cereal or a small amount of hemp seeds. The texture will be slightly different, but they will still hold together well.
Yes – they freeze beautifully. Store in an airtight container with baking paper between layers for up to 3 months. They can go straight from freezer to lunchbox and will soften by morning tea.
Did you make this recipe?
Mention us @theglutenfreekids or tag us using #theglutenfreekids so we can see your creations! You can also leave a comment below!